 Scooter Lust two wheels, one love
When I first brought home my Vespa GTS, I was having problems with the battery. Despite 200 miles of riding in one weekend, the battery failed to charge. The shop replaced the battery with a new one, but it would still quit unexpectedly. It would hold a full charge for a few days, and then randomly stop.
The shop guy suggested that because I had a short commute, the battery did not have time to replenish the amount of power required to electrically start the scooter. I didn’t buy it; a scooter of Vespa’s pedigree should be able to handle five days of short trips on a brand-spankin-new battery without konking out. From a purely consumer view, his explanation didn’t fly.
When the GTS died after shop closing time on a Saturday, I knew I had at least two days to ruminate on this topic, since the shops don’t open again until Tuesday. I decided to take things into my own hands and rule out the Many Short Trips theory by getting a battery charger.
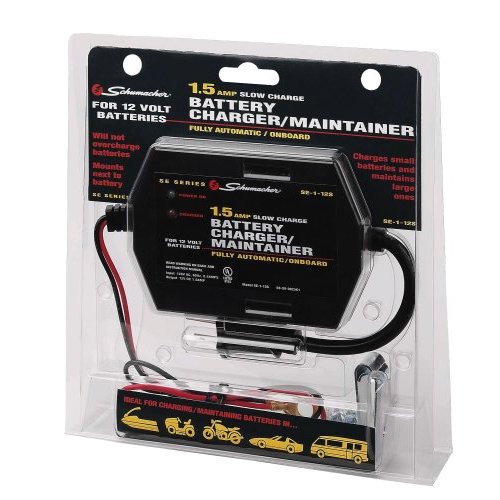
On the advice of a friend, I picked up a Schumacher 1.5 AMP Battery Charger and Maintainer. It was $35. This kind will charge your battery from a dead state and then go into trickle charge mode, maintaining the charge without frying the battery.
Trickle chargers are good if you’re going to leave your bike sitting for the winter, or if you think it just needs a little reviving. I know some folks who plug in their trickle charger weekly just to maintain the battery.
It’s very important that you match your type of battery with the strength of the charger amperage and volts. The model I bought will charge a totally dead battery, but it takes about eight hours.
I’m happy with the one I got, and as the registration questionnaire asks, yes – I guess I’d recommend it to a friend.
My only gripe is the length of its cord, which required some stacking and juggling to bridge the gap between the electrical outlet on the wall and the battery on the ground. But that’s more likely the fault of my awesome 60-year-old apartment with really weird wiring, so take my criticism with a grain of salt.
In the end, the electrical problems with the GTS were not directly related to the battery; it was a faulty rectifier. The rectifier was replaced and I haven’t had a problem since – neither have I needed to use the trickle charger for my endless row of short commutes, since the Vespa is more than able to handle it. Everybody wins!
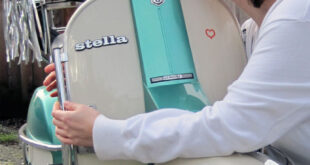
The Stella battery is a piece of cake to get to – you just take off the left cowl and thar she blows. The Vespa’s was slightly more of a treasure hunt, so I thought I’d share some photos I took during the process so you can see where it is.
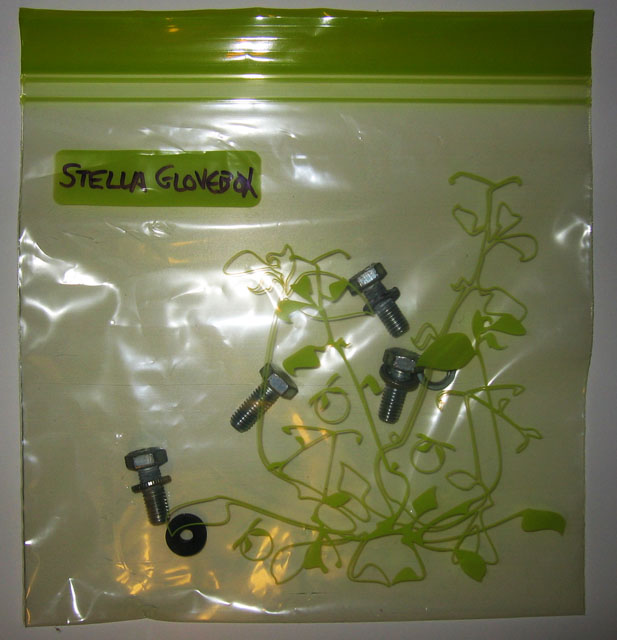
An indispensable tip I’d like to pass on involves Ziploc bags and Sharpie permanent markers. You can never have too many Ziplocs or Sharpies, in my opinion. They are the dynamic duo of organization. When I’m working on my scooter, I get a (fancy green Ikea) Ziploc bag and write the name of the scooter and the specific part on it with black Sharpie. Then as I remove each screw, I put it right into the plastic bag.
I’ve mentioned before that I believe in acknowledging one’s weaknesses and planning accordingly. I lost a screw while installing the chrome crash bars on the Vespa and went out of my mind for countless hours, attempting to make a non-fitting screw work, and then finally having to ride all the way to the shop for a replacement. If I had just dropped the screw into a Ziploc bag while I was working, I would have saved myself quite a headache.
This technique is also useful if you’re like me and get halfway through a project and then need to make a sandwich… and then some bright, shiny thing hijacks your attention and it’s days before you finish up. Your screws and other sundries will still be waiting patiently, labeled clearly in your Ziploc bag when you return.
If you have more than one scooter, include that info so you don’t spend half a day trying to figure out why the screw labeled “left mirror” doesn’t fit on the left mirror because it belongs to your Stella, not your Vespa. That’s a purely hypothetical example, I assure you.
I also recommend a digital camera, with which you can take a photo as you remove each part of your scooter. Then when you’re putting it back together, if you forget what goes next, you can just look at your photos in reverse order.
Technology is our friend – embrace it!
Editor’s note: please excuse my dirty scooter. I didn’t realize how badly it needed washing until I looked at these photos on my lovely 32″ glossy screen.
I don’t have to tell you to turn off your scooter before doing this, do I? You knew that, right?
Of course you did. You’re so smart.
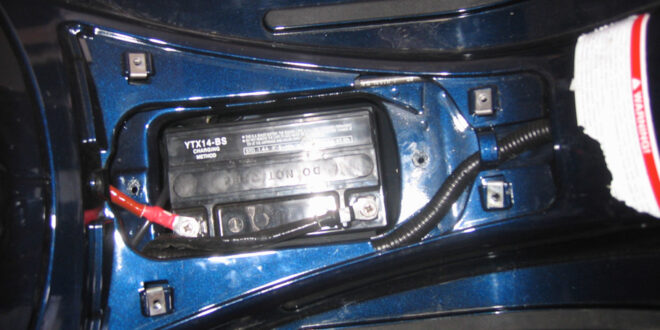
In the GTS, the battery is located underneath the floorboard, in between your feet when you’re riding. You’ll need a Phillips head screw driver (the one with the crosshead) to access the battery panel in the floorboard.
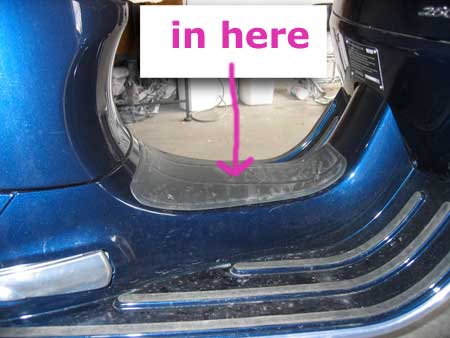
It’s held in place by four Phillips head screws. Here’s one of them:

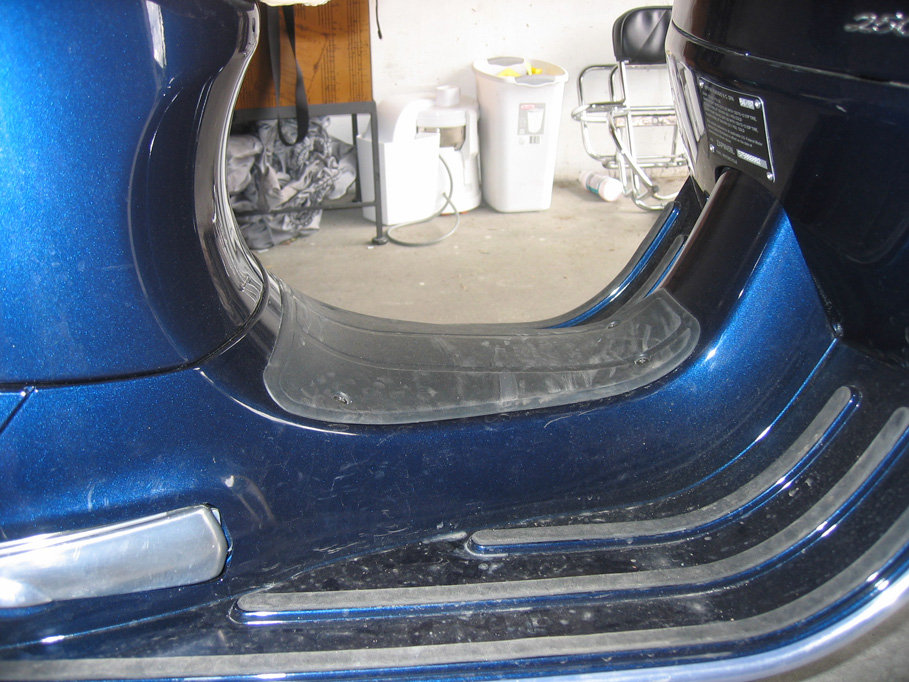
Just loosen those puppies up (lefty-loosey) and drop them in your labeled Ziploc bag. Once the screws were out, I used a flat head screwdriver to gently lift up the floor board. Be careful because the panel is plastic and you don’t want to scratch or crack it. Just be gentle. There, there.
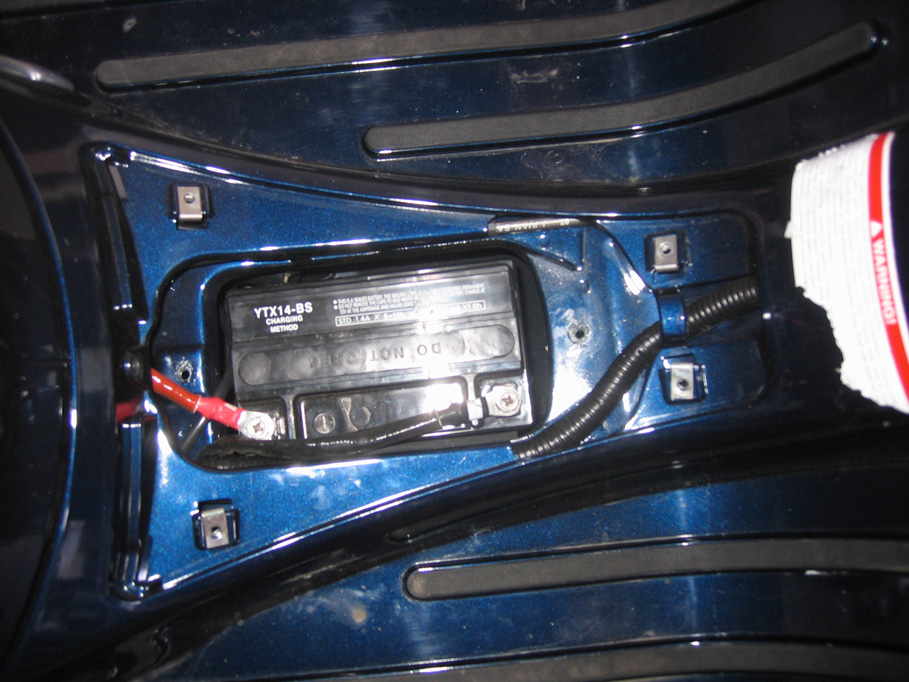
Voila! There’s your battery. There’s also a black plastic bar that stretches across the battery, held in place by two screws, which you need to remove (not shown). Once that’s off, you just have to loosen the screws holding the wires on to the battery – the red one and the black one.

It’s much heavier than it looks so don’t expect to lift it out with one finger or anything.
Once the battery was out, I followed the directions that explain how to attach the red and black wires to the charger, just like they were attached inside the scooter. It’s not rocket science; you just have to match the colors. They also recommend connecting the battery to the charger before plugging the unit into the electrical outlet. A wise move, my friends.
If you need help selecting a charger, I recommend going into the shop and talking to an actual human, if you can find one.
I had good luck at my local auto supply store – once they stopped looking for my boyfriend so they could have him translate. “ME. I’m right here. Focus. Don’t let the ponytails fool you – I can handle it, I promise.”
Eventually they’ll learn that a girl with grease on her hands and a screwdriver in her pocket is a force to be reckoned with. Until then, don’t let them get away with it. 🙂


Interesting and fun to read!